Create a Presale Campaign
This guide provides a step-by-step walkthrough on how to create a presale campaign for your token using the ElectroSwap Launchpad. Follow these steps to set up your presale, raise funds, and launch your token with crowd-sourced liquidity. No coding skills are required!
A presale allows you to sell tokens before adding liquidity. Proceeds from sales are used to create a liquidity pool with the remaining token supply.
Step 1: Navigate to Create Presale
- Navigate to Launchpad Central by clicking on the "Launchpad" link in the navigation bar.
- Click "Create Presale" or navigate directly by clicking here.
- Review the input fields described in more detail below.
Step 2: Choose Token Type
Toggle Use a custom token:
- Enabled: Provide an existing token address. Name, symbol, and decimals will auto-populate. This option requires ElectroSwap approval before presale becomes active
- Disabled: A new token will be generated for you using the fields you populate below.

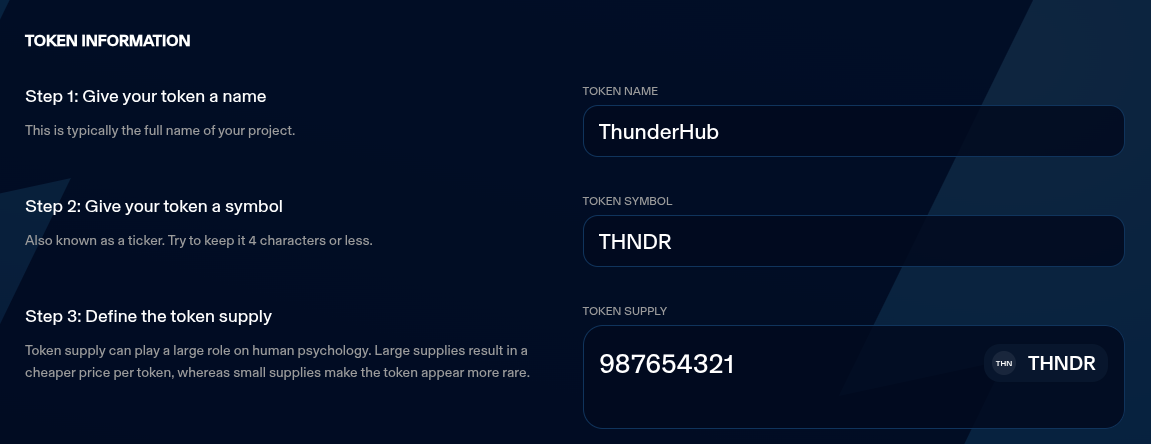
Step 3: Token Information
- Token Name: Enter or confirm the full name (e.g., "My Project Token"). Must be 25 characters or less.
- Token Symbol: Enter or confirm the ticker (e.g., "MPT"). Must be 2-6 uppercase letters or numbers.
- Token Supply / Tokens to Transfer: Specify the total supply (for new tokens) or amount to transfer (for custom). Must be positive and not exceed your balance if custom.
Step 4: Fundraising Goals
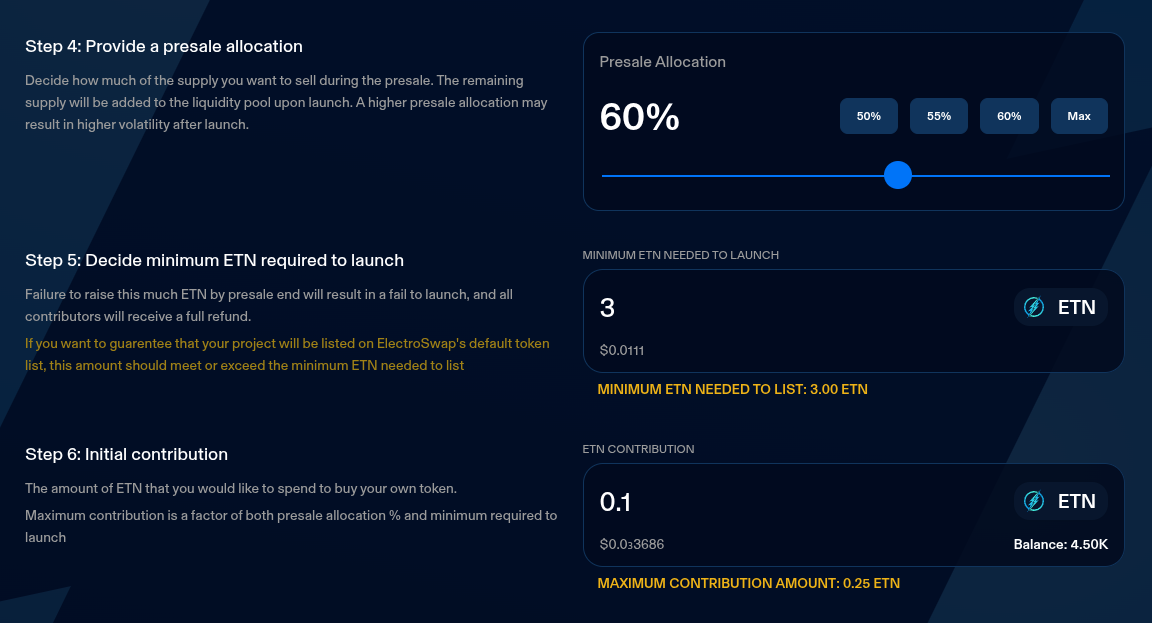
- Presale Allocation: Set the percentage of supply to sell during presale (50-67%).
- A higher value will result in a higher price per token at the time of launch. This may result in increased volatility.
- Remaining allocation is added as liquidity.
- Minimum ETN Needed to Launch: Set the minimum ETN to raise.
- If not met, presale fails to launch and contributors are refunded.
- If met, a liquidity pool will be created and the token will be tradable on ElectroSwap
- To qualify for ElectroSwap's default token list, this value should meet or exceed the displayed minimum needed to list.
- ETN Contribution: Your initial ETN amount to contribute (buy your own tokens).
- Must be between calculated min and max.
Step 5: Affiliate Program (Optional)
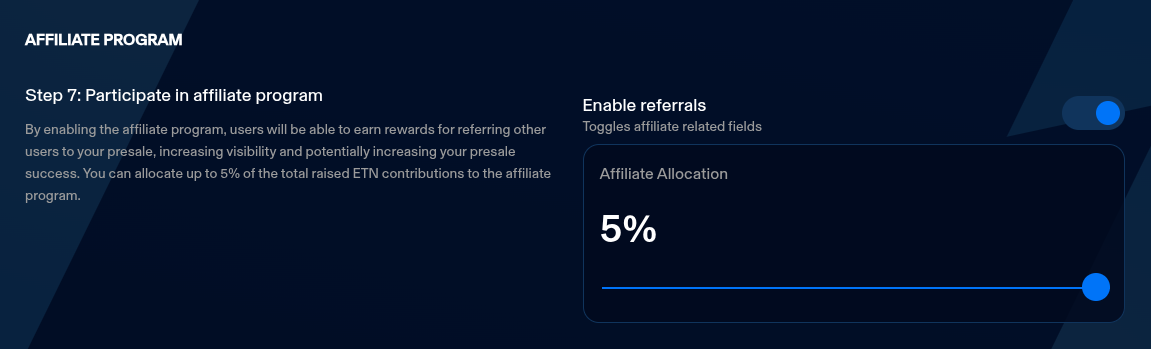
Toggle Enable referrals:
- If enabled, set Affiliate Allocation (1-5%) of raised ETN for referral rewards.
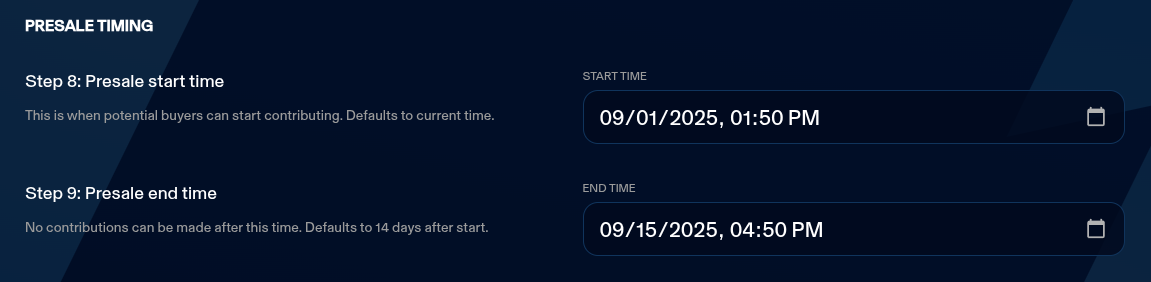
Step 6: Presale Timing
- Start Time: When contributions can begin (defaults to 1 hour from now).
- End Time: When presale ends (defaults to 14 days after start).
- Must be after start and meet minimum duration.
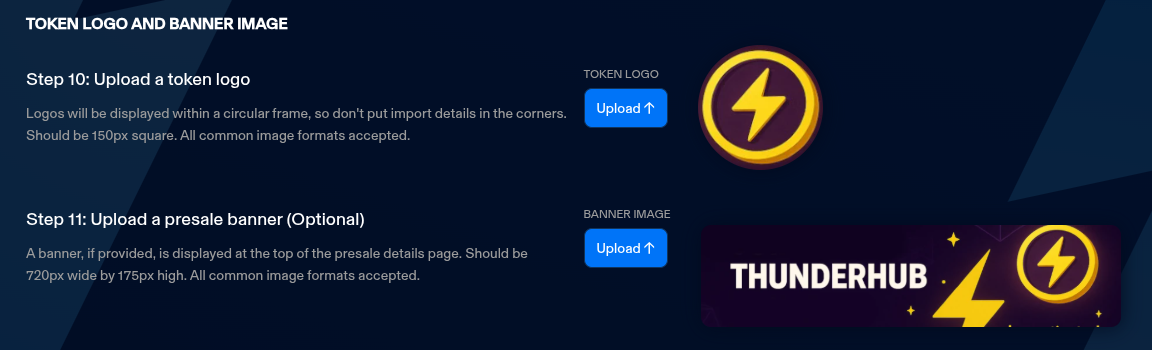
Step 7: Images
- Token Logo: Upload a square image (PNG, JPG, WEBP, <2MB).
- Banner Image (Optional): Upload a banner (PNG, JPG, WEBP, <2MB, ideally 720x175).
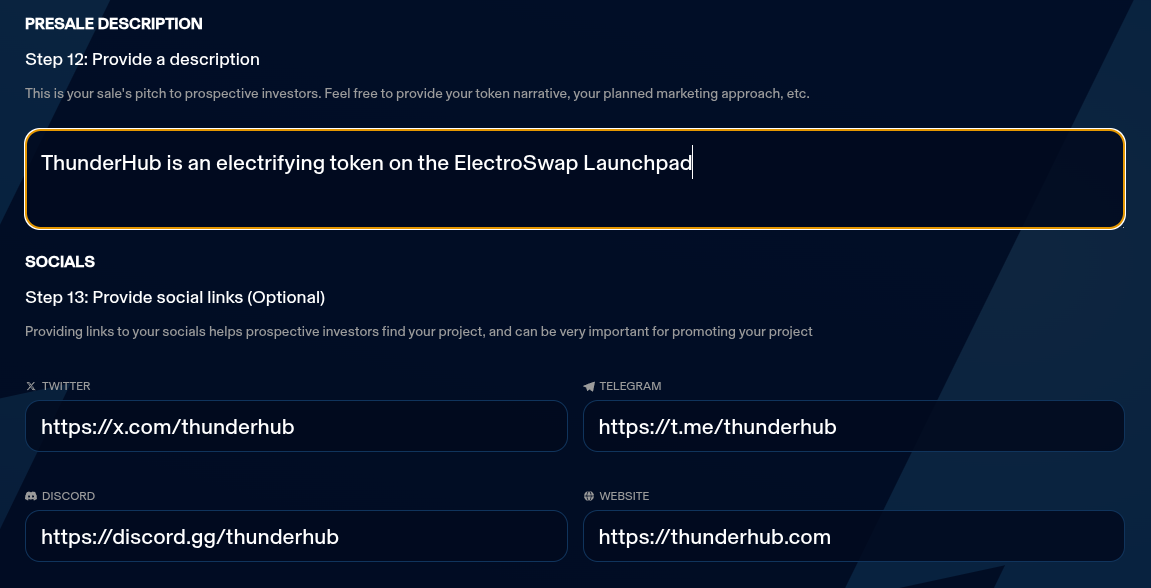
Step 8: Description & Socials
-
Write a description (10-500 characters) about your presale, token, project, and plans.
-
Provide social media URLs (optional, but recommended)
- Telegram
- Discord
- Website
Step 10: Approval (If Using Custom Token)
- Approve the transfer of your tokens to the presale pool.
- You will be prompted to sign in your wallet.
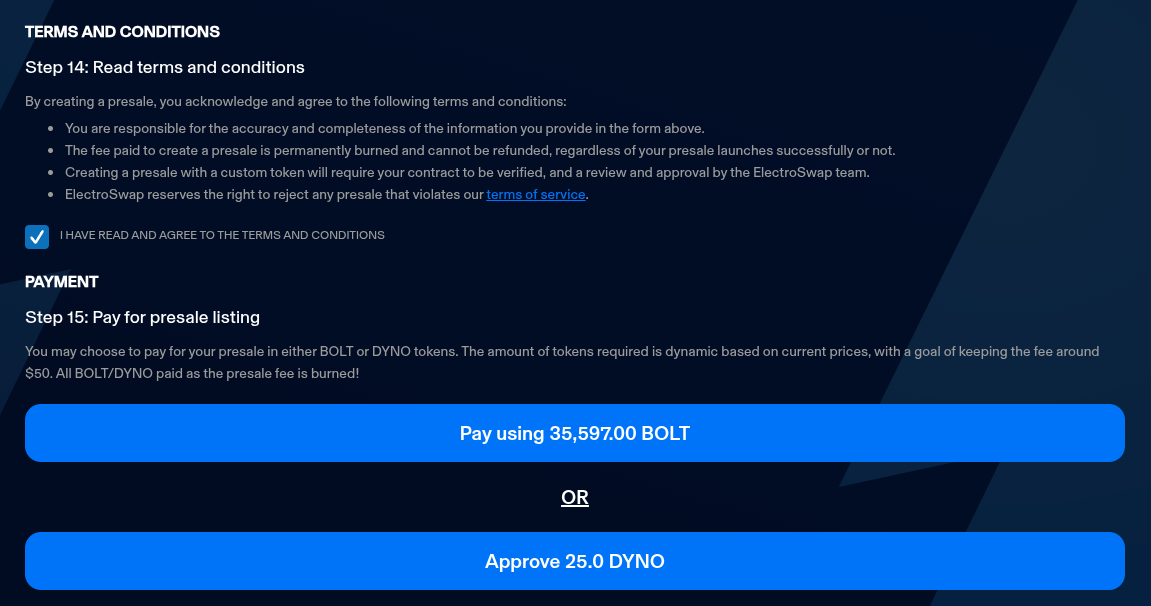
Step 11: Terms, Conditions and Payment
- Read the terms and conditions confirming that you are responsible for provided information.
- Fee is non-refundable and burned.
- Custom tokens require verification and approval.
- ElectroSwap may reject violating presales.
- Check the box to agree.
- Pay the fee (~$50 equivalent, burned) using BOLT or DYNO.
- Approve the token if needed.
- Confirm the transaction in your wallet.
Upon success, you'll be redirected to your presale's page.
If you encounter errors, ensure all fields are correctly filled and validated.