Adding V2 Liquidity
ElectroSwap, leveraging the proven mechanics of Uniswap V2, offers a straightforward process for adding liquidity to existing pools or creating new ones. This guide will walk you through both processes, enabling you to support your favorite trading pairs and earn trading fees in return.
Adding Liquidity to an Existing Pool
Contributing to an existing liquidity pool on ElectroSwap allows you to earn a portion of the trading fees generated by that pool. Here's how to do it:
Step 1: Connect Your Wallet
- Visit the ElectroSwap interface
- Connect your wallet by clicking on the "Connect Wallet" button. Ensure your wallet is compatible with the Electroneum Smart Chain.
Step 2: Navigate to the V2 Liquidity Page

-
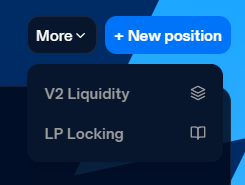
Click on "Pools" at the top of the ElectroSwap interface, select "More" to switch to V2.
-
Alternatively, you can navigate to the V2 Liquidity Page directly
Step 3: Add Liquidity
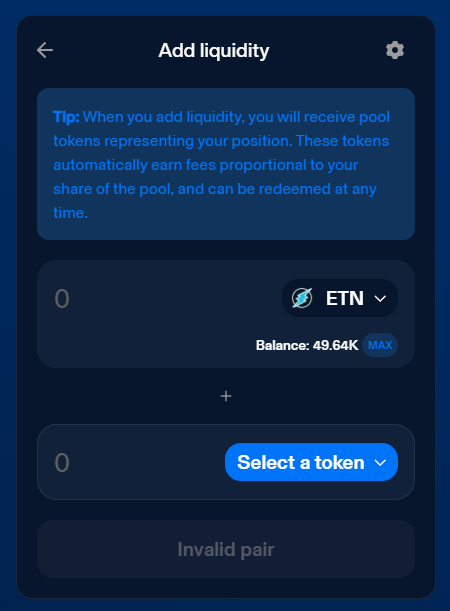
- Click on the "Add V2 Liquidity" button on the top right

Step 4: Select Your Tokens
- Choose the ETN and the token pair you wish to provide liquidity for. If you haven't selected a pair, click on the "Select a Token" button and choose from the list of available tokens.
Step 5: Enter Amounts
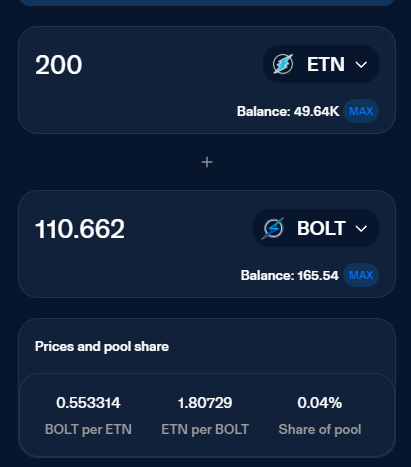
- Enter the amount for one of the tokens. ElectroSwap will automatically calculate the equivalent amount of the other token based on the current pool ratios, maintaining the value ratio of the two tokens.
Step 6: Approve and Supply
-
If it's your first time providing liquidity for the selected token pair, you'll need to approve ElectroSwap to access your tokens. Click "Approve" and confirm the transaction in your wallet.
-
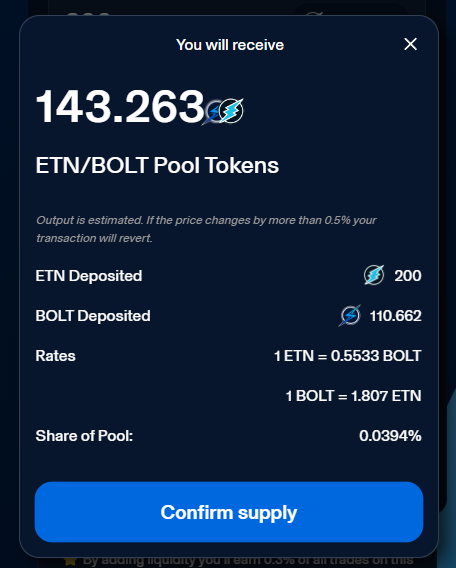
After approval, click on "Supply," and you'll see a summary of the transaction. Confirm the details, including the amounts of tokens you're supplying and your share of the pool.
-
Confirm the transaction in your wallet. Once it's processed, you'll have successfully added liquidity to the pool.
Creating a New Liquidity Pool
If you're looking to create a market for a pair that doesn't exist yet on ElectroSwap, you can create a new liquidity pool. Here's how:
Step 1 to Step 3
Follow Steps 1 to 3 from the section above, selecting the token pair for which you want to create a pool. If one of the tokens isn't listed, you may need to paste its contract address into the search box to find it.
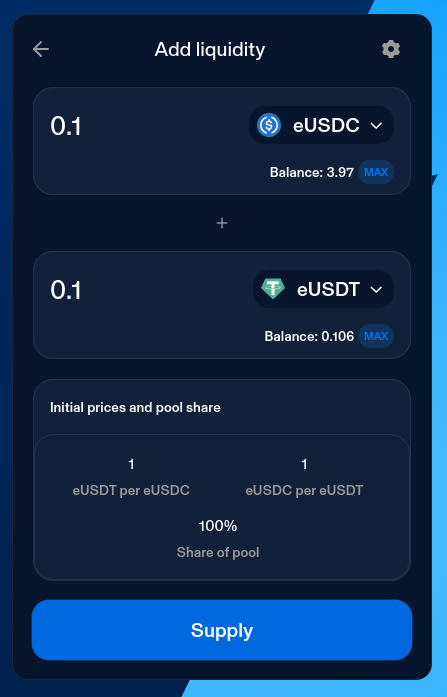
Step 4: Set Initial Prices
-
Since you're creating a new pool, you'll set the initial price for the token pair. Enter the amounts for both tokens, keeping in mind the initial price ratio will determine the market's starting exchange rate.
-
Be cautious when setting the initial price, as this can significantly impact the market's perception and the initial liquidity depth.
-
Approve both tokens (if required) and then click "Supply" to create the pool.
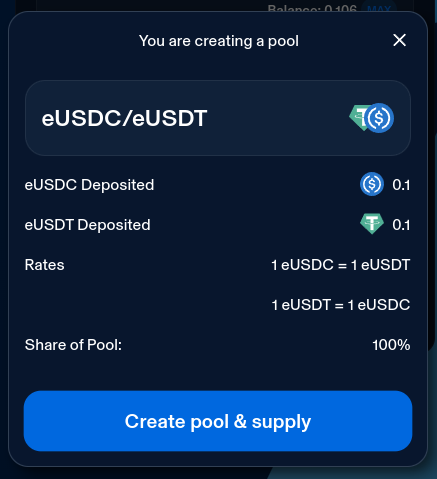
Step 5: Create Pool and Supply
-
Review the initial prices and your pool shares carefully before confirming.
-
After confirming the details, proceed to confirm the transaction in your wallet, and wait for your transaction to be mined.
-
Congratulations, you've just created a new liquidity pool on ElectroSwap!
Final Thoughts
By adding liquidity on ElectroSwap, you're contributing to the decentralized finance ecosystem and can earn trading fees from the transactions that occur in your liquidity pool. Remember, providing liquidity involves certain risks, including impermanent loss, so it's essential to understand these before participating.
For more detailed instructions and tips on managing your liquidity on ElectroSwap, visit our FAQs or contact our support team.